Homeowners often fear drilling into stucco more than any other exterior material. Unlike wood siding that forgives small mistakes, stucco is a rigid, brittle mixture of cement, lime, and sand. One slip of the drill, or choosing the wrong season to work, can lead to spiderweb cracks that ruin your home’s curb appeal.
A common question we receive is, “How do I drill through stucco in March?” This question is specific and smart. March is a deceptive month for home improvement. Depending on where you live, March brings a mix of thawing ice, spring rains, and fluctuating temperatures. Drilling into your exterior walls during this transition period requires special attention to moisture sealing and handling thermal expansion.
In this comprehensive guide, we will go beyond the basics. We will explore the anatomy of stucco, why the “March Factor” matters, the exact tools you need, and a failsafe step-by-step process to hang anything from heavy hose reels to lightweight address numbers.
Table of Contents
Understanding Your Wall: What is Stucco Actually?
To drill successfully, you must know your enemy. Stucco is not just a layer of “hard mud.” It is typically a three-layer system reinforced with metal:
- The Scratch Coat: The bottom layer that grips the metal lath.
- The Brown Coat: The middle layer that adds thickness and strength.
- The Finish Coat: The thin, textured top layer that gives the visual appeal.
- The Wire Mesh (Lath): This is the tricky part. Hidden inside the concrete layers is a metal chicken-wire mesh. If your drill bit snags this wire, it can rip a chunk of stucco right off your wall.
The “March Factor”: Why Season Matters
Why focus on March? March is known for high humidity and temperature swings.
- Moisture Infiltration: When you drill a hole, you pierce the waterproof barrier of your home. In March, rain and melting snow are rampant. A naked hole is an open invitation for water to seep behind the stucco, rotting the wood framing and causing mold.
- Thermal Shock: Stucco expands and contracts with heat. Drilling aggressive holes when the wall is cold (early March mornings) can increase the risk of cracking compared to drilling on a warm summer day.
Essential Tools Checklist for Stucco
Do not attempt this project with your basic household drawer tools. You need specific gear to handle masonry.
- 1. Hammer Drill (Highly Recommended):
While a standard rotary drill can bore small holes (under 1/4 inch), a Hammer Drill is superior. It combines rotation with a pulsing “hammering” action that pulverizes the concrete as it spins. This makes the job 80% faster and reduces heat buildup. - 2. Masonry Drill Bits (Mandatory):
You cannot use wood or metal bits (Black Oxide or Titanium). You must use Carbide-Tipped Masonry Bits. These bits have a wide, arrow-shaped head designed to crush stone.- Tip: Buy a set that includes sizes from 1/8 inch to 1/2 inch.
- 3. Masking Tape / Painter’s Tape:
This is the secret weapon of pros. It prevents the drill bit from “walking” or slipping on the bumpy surface before it starts cutting. - 4. Silicone Caulk (Exterior Grade):
Essential for March projects. You need to seal the hole to prevent water damage. - 5. Safety Gear:
Drilling concrete produces silica dust, which is hazardous to your lungs. Always wear an N95 mask and safety goggles.
Masonry drill bit vs wood bit]
Step-by-Step Guide: How to Drill Through Stucco Safely
Step 1: Location and Marking
Determine exactly where you want the hole. Use a stud finder if you are mounting something heavy (over 10 lbs).
- Action: Tear off a piece of masking tape and stick it firmly over your drilling spot. Mark your “X” on the tape with a pencil.
Step 2: The Pilot Hole (Do Not Skip)
Never start with a large bit. If you need a 3/8 inch hole for a large anchor, start with a 1/8 inch bit.
- Technique: Hold the drill perpendicular (straight) to the wall. Apply steady, firm pressure. Do not lean your entire body weight into it; let the Hammer Drill do the work.
Step 3: Navigating the Wire Mesh
As you drill, you might feel a sudden “catch” or hear a metallic scratching sound. This means you hit the wire mesh.
- Action: Maintain your drill speed but reduce forward pressure slightly. Let the carbide tip cut through the thin wire. If you push too hard here, the mesh might tear the stucco.
Step 4: Widening the Hole
Once the small pilot hole is complete, swap your bit for the final size (e.g., 5/16 or 3/8 inch).
- Re-insert the drill into the pilot hole and drill again. The larger bit will follow the path of the pilot hole smoothly without wandering.
Step 5: Cleaning the Dust
Concrete dust will clog the hole. Use a can of compressed air or a simple turkey baster to blow the grey dust out of the hole. This ensures your anchor fits all the way in.
Anchoring: Plastic Anchors vs. Toggle Bolts
Once the hole is drilled, how do you hold the screw?
- Light Loads (Mailboxes, House Numbers): Use Plastic Expansion Anchors. Tap them in gently with a hammer until flush with the wall.
- Medium Loads (Cameras, Lights): Use Toggle Bolts. These pass through the stucco and spring open inside the wall cavity for a strong grip.
- Heavy Loads (Hose Reels, TV Mounts): You MUST drill into the wood stud behind the stucco and use Lag Bolts. Stucco alone cannot support heavy weight.
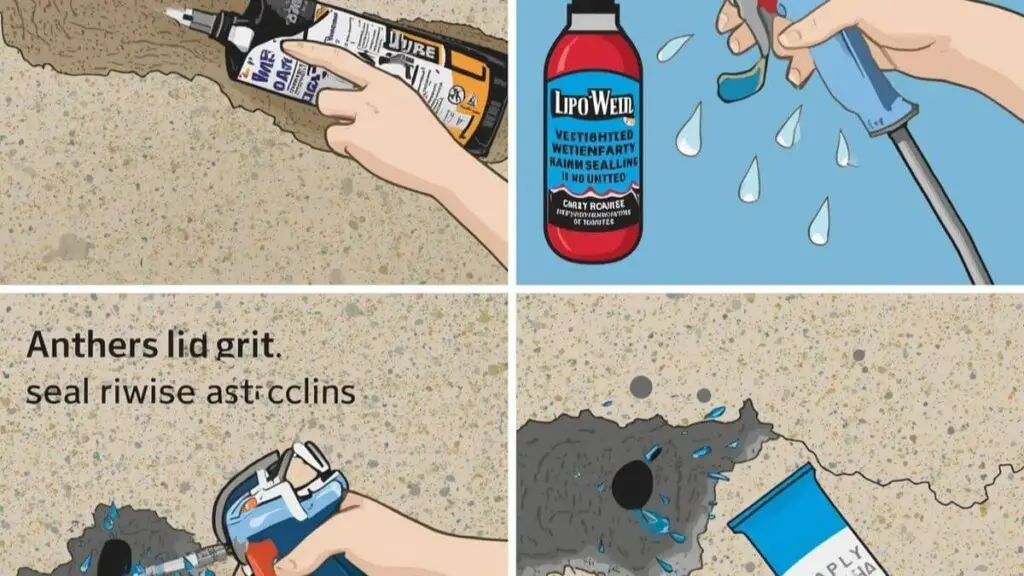
Waterproofing: The Final Critical Step
Since we are discussing drilling in March, this step is non-negotiable.
- Before inserting your anchor or screw, take your Silicone Caulk tube.
- Squeeze a generous amount of silicone directly into the drilled hole.
- Insert your anchor/screw. The silicone will ooze out slightly—this is good! It means the seal is airtight.
- Wipe away excess caulk with a rag. This prevents rain from rotting your home’s framing.
Sealing stucco holes
Common Mistakes That Ruin Stucco
- Using a Dull Bit: A dull bit creates friction heat. Heat causes the stucco to crack. If your bit is struggling, replace it immediately.
- Hammering the Anchor Too Hard: When tapping in a plastic anchor, if you hit it too hard, you can crack the stucco around the hole. Be gentle.
- Ignoring the Weather: Do not drill if it is currently raining. Wait for a dry day so moisture doesn’t get trapped inside the hole immediately.
FAQ: Frequently Asked Questions
Q: Can I use a regular cordless drill if I don’t have a hammer drill?
A: Yes, but it will take much longer. For a standard drill, use a high-quality masonry bit and go slow to avoid overheating the motor.
Q: How do I repair a hole in stucco if I made a mistake?
A: For small holes, use a tube of “Stucco Patch” found at hardware stores. It comes textured. Fill the hole, dab it with a brush to match the texture, and paint it once dry.
Q: Is drilling stucco the same as drilling brick?
A: Similar, but stucco is thinner and more prone to cracking than solid brick. The wire mesh in stucco also presents a unique challenge that brick doesn’t have.
Q: Can I drill through stucco in winter?
A: You can, but silicone and patching materials do not cure well in freezing temperatures. March is better, provided you waterproof correctly.
(Conclusion)
Mastering how do I drill through stucco in March comes down to three P’s: Preparation, Pilot holes, and Protection (sealing). Do not let the hardness of the material intimidate you. By using a masonry bit, starting small, and sealing your work against the spring weather, you can install any fixture securely and keep your home’s exterior looking pristine for years to come.