Want to hang a picture or a shelf in your rental apartment? You’re not alone. But the fear of losing your security deposit often stops tenants from making their space feel like home. So, can you drill holes in apartment walls? The short answer is: usually, yes—but you need to do it correctly and responsibly.
This guide will walk you through everything a renter needs to know, from checking your lease agreement to asking your landlord for permission, and most importantly, how to patch the holes perfectly before you move out.
Table of Contents
Tip 1: Communicate Clearly With Your Landlord
Drilling holes in apartment walls ? Yes – but be sure to adhere to guidelines. Get permission from your landlord and observe any restrictions, such as drilling during certain hours or in certain areas. Before you drill holes in apartment walls, it’s crucial to check your lease. Tools and techniques matter – use the right ones, and clean up after yourself. That way, you can avoid damage and keep living peacefully.
Different wall types require different drill bits and techniques. For instance, drywall needs gentle handling, while concrete may need a powerful power drill. Use a stud finder to locate structural elements before drilling.
Noise restrictions and quiet hours? Check your building management or local regulations. To avoid problems, respect these rules.
Be careful when drilling. Measure accurately first, and use masking tape to minimize splintering. Take your time to get the best result.
Drilling holes responsibly can give you many benefits. Personalize your space, make it feel like home, and enjoy the process!
Tip2: Guide to Drilling Holes in Apartment Walls
The process of patching up holes in apartment walls is quite simple. To understand the rules and regulations surrounding drilling holes in your apartment walls, dive into an overview of general rules and specific regulations for drilling holes. Gain insights into the do’s and don’ts, especially.
Overview of general rules for drilling holes in apartment walls
drill holes in apartment walls. Drilling in apart walls? Make sure you know the rules! Here’s what you need to do:
- Check the wall: Don’t start drilling until you know what’s behind it. Electrical wires, plumbing pipes, and other hidden fixtures could get damaged.
- Get permission: Ask the landlord or management first. They might have specific guidelines about hole size, location, and tools you can use.
- Use good tools: Invest in tools that are designed for apartment walls. No heavy machinery that can damage your wall or bother other tenants.
- Fill and restore: Once you’re done drilling, use spackling paste or putty to fill up your holes and fix any surface damage.
Each building has its own rules. If you need a lot of holes or something complex, you may need to hire a pro. Safety and respect for other people is key.
Fun fact: Homeowners can modify their property more than renters! Just make sure you follow local regulations and permits.
Specific regulations for drilling holes in walls . drill holes in apartment walls
Drilling holes in walls ? Must-knows! Follow these guidelines for responsible drilling:
- Get permission from the right people.
- Keep noise levels low at certain times.
- Exercise caution when drilling.
- For efficiency, mark the spot on the wall with measuring tape and pencil.
No issues!
Preparing for Drill Work
drill holes in apartment walls
drill holes in apartment walls To ensure a successful drill work session in your walls , effectively prepare by gathering necessary tools and materials, as well as assessing the condition of the walls. The former helps you have everything you need at hand, while the latter ensures you proceed with confidence.
Gathering necessary tools and materials
drill holes in apartment walls. Gather what you need for drill work? Follow these steps!
- Identify the tools and materials needed. This could be drills, drill bits, screws, nails, measuring tape, and safety goggles.
- Create a checklist of all items. This will make sure nothing is forgotten.
- Gather the items from hardware stores or your own tool collection. Keep them in one place.
- Inspect everything to ensure quality and functionality. Replace anything worn-out or damaged.
- Remember, be well-prepared for successful drill work!
Pro Tip: Keep tools clean and well-maintained to keep them working optimally.
drill holes in apartment walls and Assessing the condition of the walls
Assess those walls! Follow 3 steps:
- Inspect for cracks or damages. Look closely for any cracks, holes, or other damage – record the size/location.
- Check for moisture or dampness. Use a meter or feel the walls to detect sign of dampness.
- Evaluate wall material. Is it concrete, drywall, brick, etc.? Know the material – it’ll determine the drilling techniques/tools.
More! Pay attention to anything that could affect the drilling process, such as electrical wiring or plumbing pipes. Don’t drill into these areas!
Safety First: Wear safety gear like goggles and gloves. Safety is key.
Steps for Drilling Holes in Apartment Walls
drill holes in apartment walls , follow these steps for a successful and hassle-free process. Begin by choosing the right drill bit, then locate studs or wall anchors to ensure stability. Next, mark the drilling spots accurately, and finally, proceed with drilling the holes. The process of patching up holes in apartment walls is quite simple. These sub-sections will guide you through the entire process effectively.
Choosing the right drill bit
Different materials need different drill bits. For example, masonry walls want masonry drill bits, and wood walls require wood drill bits. Measure the size of the hole you need and choose a drill bit that fits that size.
There are various types of drill bits, like twist bits, spade bits, and hole saws. Think about the project’s requirements and pick a drill bit that suits it.
High-quality drill bits are necessary for accurate and neat holes. Don’t buy cheap or low-quality drill bits – choose brands with carbide-tipped or cobalt drill bits.
Remember to use lubrication when drilling to help your drill bits last longer and reduce friction and heat.
Finally, make sure your chosen drill bit matches the wall material and hole size needs before you start drilling.
Locating studs or wall anchors
My friend Kim had a tale to tell: She was all ready to decorate her new apartment, but had no clue how to locate studs or wall anchors. She blindly drilled holes; only to end up with shelves that wobbled and paintwork that was ruined.
But then Kim learnt the right techniques to find studs. She used a stud finder tool, tapped lightly on the wall, and listened for a solid sound. She searched for electrical outlets and switches, and used a magnet to check for metal parts. Even if there were no visible indicators, she could try poking small holes with a finishing nail until she hit the stud.
It’s essential to remember that buildings may vary in construction methods and materials used. So, it’s wise to consult your landlord or building management if ever in doubt.
Marking the drilling spots
drill holes in apartment walls. Drilling holes in apartment walls can feel like an intimidating task. But with the perfect approach, you’ll do it with ease. To mark the drilling spots accurately, use this 3-step guide:
- Prep is essential: Gather all the items you need – a pencil, tape measure, and a level. This will help get correct measurements and straight lines.
- Find studs or anchors: Use a stud finder or tapping method to locate them. This is crucial for stability and support.
- Measure twice, drill once: Get the positions of the studs/anchors with your tape measure. Lightly mark the points with a pencil. Double-check your measurements before drilling.
Check with your landlord/building management for specific instructions on drilling spots. Then proceed with caution and precision. A mistake in measuring or marking can cause unwanted repairs or damages. So take your time and follow each step.
Be fearless! Start by gathering your tools, and within no time, your walls will be ready for that perfect piece of art or shelf. Enjoy drilling!
Drilling the holes
- Before you start drilling into your wall, take a look for any wiring or pipes that might be hidden.
- Use a stud finder to figure out where the studs are.
- Mark the exact spot you want to drill with a pencil or chalk.
- Select the right drill bit for the job.
- Hold the drill firmly and angle it correctly.
- Begin drilling slowly, and increase speed if needed.
- Apply pressure, but don’t push too hard.
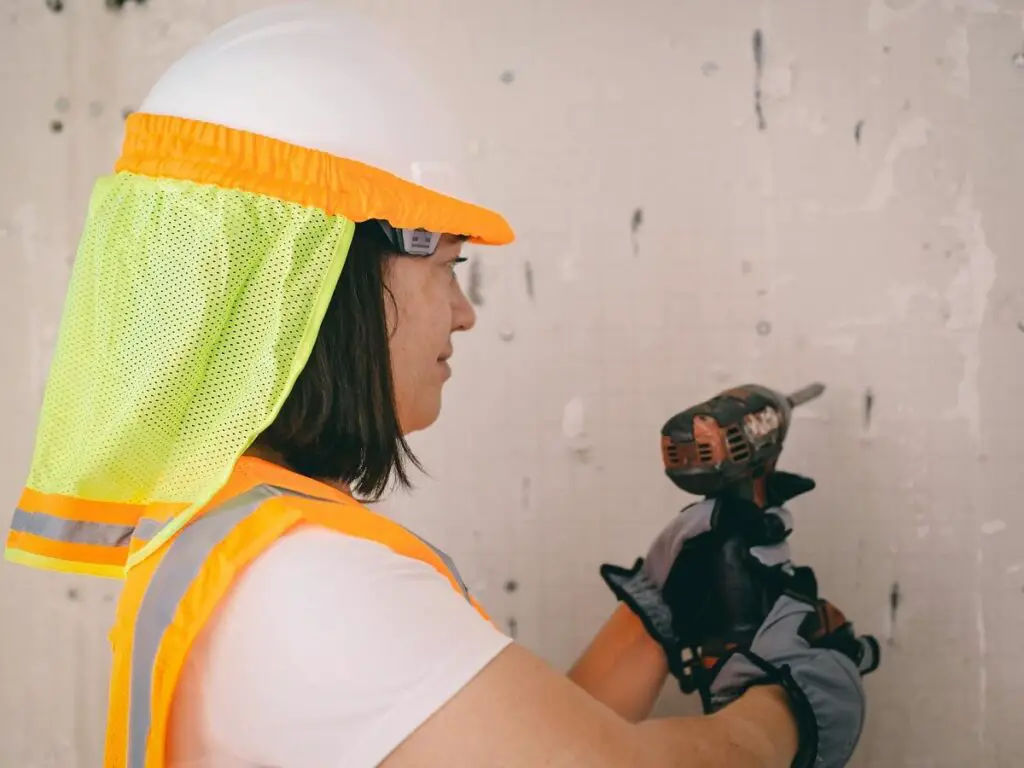
Safety is key when you’re drilling holes in walls! Wear protective eyewear and gloves. Keep cords away from your drilling area. Have a fire extinguisher nearby in case of an emergency.
In the ancient days, holes in walls were made using chisels and mallets. Now, with drills, it’s much easier to make holes!
Precautions and Safety Measures
drill holes in apartment walls. To protect yourself and your apartment walls , implement precautions and safety measures. Safely drill holes in your walls using protective gear. Prior to drilling, check for electrical wires or plumbing to prevent damage. After drilling, ensure to patch and repair the holes for a tidy and secure finish.
Using protective gear
Always wear a helmet when biking or playing rugby. It shields your head from impacts and helps to avoid brain injuries.
When working with chemicals, dust, or anything airborne, don safety goggles for eye protection.
Different tasks might need distinct gloves – like leather for construction work, and latex for medical duties.
Respirators are a must in environments with inhaling hazards, avoiding contamination of your respiratory system.
For noisy areas, use earplugs to keep away hearing loss.
Protective clothing is a must in industries such as manufacturing or construction, like fire-resistant clothes or coveralls.
To maximize the efficiency of protective gear:
- Maintain it regularly – replace worn-out equipment asap.
- Make sure the gear fits correctly, and receive proper training on how to use and maintain it.
- Respect the limits of each equipment, to stay safe and avoid risks.
Checking for electrical wires or plumbing
Using a stud finder to detect electrical wires and plumbing behind walls is a must. Before drilling or cutting into walls, make sure to turn off the main power supply. Near the area of work, check for water shut-off valves to prevent flooding.
Also, be aware of any exposed wiring or loose connections, which can be hazardous. In case of uncertainty about the inspection process, hiring a professional electrician or plumber is highly recommended. Furthermore, protective gear, such as gloves and goggles, should be worn when handling electrical components.
SafetyMag informs us that many workplace injuries occur due to electrical accidents during renovations. To ensure a secure environment for all involved parties, it is essential to take necessary precautions and follow safety measures.
Patching and repairing the holes
When tackling holes, it’s essential to go about it the right way. Here’s a guide:
Before you drill holes in apartment walls, it’s crucial to check your lease.
Inspect the damage: Take a good look at the hole and determine its size and cause. This’ll help you choose the right materials.
- Get your tools: Gather patching compound, putty knife, sandpaper, primer, etc. before starting the job.
- Clean up: Remove dust and debris from the hole and its vicinity.
- Patch it up: Use a putty knife to fill the hole with the patching compound. Even out the surface.
- Sand & paint: Once it’s dried, sand any rough edges. Then apply primer and paint to match the environment.
Be sure to keep these steps in mind when dealing with holes. Note that certain factors like weather, wall material, or plumbing can affect your repair job.
I remember a time when a friend tried to hang a painting, and drilled right through a pipe! Their home flooded until an emergency plumber came and fixed it.
Conclusion:
How to Safely Drill Holes in Apartment Walls. To wrap up, ensure a hassle-free experience when drilling holes in your apartment walls with the following guidelines: a recap of the dos and don’ts. This will provide you with a concise summary of the key points to keep in mind when navigating this aspect of apartment living .drill holes in apartment walls
A Renter’s Guide to Smart Drilling
Drilling holes in your apartment is possible when you approach it like a pro. By following these 5 tips—from understanding your lease to mastering the art of the patch-up—you can personalize your space without risking your deposit.
Recap of the guidelines for drilling holes in walls. drill holes in apartment walls
- Measure and mark the exact spot where the hole needs to be drilled.
- Check that there are no wires or pipes behind the wall.
- Pick a drill bit suitable for the wall material.
- Drill slowly and steadily to prevent accidents.
- Clean up any debris.
- Check with your landlord or building manager before making any permanent changes.
Remember safety equipment like goggles and gloves when drilling holes in walls. Pro Tip: Look online or talk to professionals for tips and tricks for your building’s construction. Flow the Guide to Drilling Holes in Apartment Walls
Frequently Asked Questions
1. Can I drill holes in my apartment walls ?
Answer: This depends on the rules and regulations set by your apartment complex or landlord. It’s advisable to review your lease agreement or contact your landlord to seek permission before drilling any holes in the walls.
2. Are there any specific restrictions related to drilling holes in apartment walls ?
Answer: Some landlords or apartment complexes may have specific restrictions on drilling holes in walls, especially during certain months when maintenance work or renovations are scheduled. Contact your landlord or refer to your lease agreement to find out about any such restrictions.
3. What steps should I take before drilling holes in my apartment walls?
Answer: Before drilling holes, it’s important to obtain permission from your landlord or apartment management. Additionally, ensure you have the proper tools and knowledge to drill safely and accurately without causing damage to electrical wiring or plumbing behind the walls.
4. Can I use wall anchors or other alternatives instead of drilling holes?
Answer: Yes, there are several alternatives to drilling holes, such as using adhesive hooks, hanging strips, or removable wall hangers, which can often hold lightweight items without the need for drilling. However, it’s still essential to review any specific guidelines provided by your landlord regarding these alternatives.
5. What should I do if I accidentally damage the walls while drilling?
Answer: If you accidentally damage the walls while drilling, immediately inform your landlord or apartment management. They will guide you on the necessary steps to repair the damage or may arrange for professional assistance, depending on the severity of the damage.
6. Can I make temporary repairs to the walls after removing drilled items?
Answer: Temporary repairs can often be done after removing drilled items using wall filler putty and touch-up paint that matches the original wall color. However, it’s recommended to inform your landlord or management about any holes made and seek their guidance on the proper repair process.