Mastering “how to drill into plastic” effectively is a valuable skill for many DIYers and professionals, ensuring clean holes without damage.
When it comes to drilling plastic, there are a few things to keep in mind. Knowing the right techniques and tools can make a big difference. So, let’s explore!
It’s key to use the right drill bit. For plastic, use a high-speed steel (HSS) or carbide-tipped bit. These are designed for cutting through soft materials like plastic without damage.
Drilling at a steady speed is important. Too much pressure or going too fast can melt or crack the plastic. Slow and steady is best here!
Plan the size of the hole you need. If it’s small, start with a pilot hole. This will guide the larger drill bit and prevent slippage or irregularities.
My friend Lisa once had trouble drilling plastic. She tried regular drill bits, but they didn’t work. So, she asked an experienced carpenter for help. He lent her HSS drill bits designed for plastic.
Lisa used these specialized tools and drilled aligned holes without damage or cracks. She finished the furniture assembly project easily, thanks to the valuable lesson she learned.
Table of Contents
Step-by-Step: How to Drill into Plastic Successfully
Tools and Materials Needed .To drill plastic, you need some tools and materials. Here are 3 key items:
- Drill with adjustable speed settings.
- Use sharp bits specifically for drilling plastic. High-speed steel or carbide bits are good choices.
- Clamps or vise grips to secure the plastic.
Safety goggles and a dust mask are also useful to protect from debris.
Pro Tip: Start slow, gradually increasing speed. Too much pressure or speed can cause the plastic to crack or melt.
Preparing the Plastic Surface
It’s important to prepare your plastic surface before drilling. Here’s how:
- Clean: Use a mild detergent and warm water solution to scrub the surface, then rinse and let it dry.
- Mark points: Measure and mark precisely with a pencil or marker.
- Masking tape: Apply to each marked point to reduce damage during drilling.
Proper preparation is key for neat and accurate holes in plastic surfaces. Plus, use a lubricant like silicone spray or dish soap on your drill bit before drilling. It’ll make the process smoother.
Take action now and prep your plastic surfaces! Get ready for successful drilling by taking the time to do it right. You won’t regret it!
Choosing the Right Drill Bit
To effectively drill into plastic, you need to choose the right drill bit. In this section, we’ll explore the solution to this by discussing the types of drill bits for plastic and how to select the correct size.
Types of Drill Bits for Plastic
Certain drill bits are needed for smooth and exact drilling of plastic materials. Here are the types of drill bits suitable for plastic:
- Twist Drill – Commonly used for general purpose drilling.
- Brad-Point – Best for precise holes in plastics.
- Spade – Specially designed for quickly drilling plastic surfaces.
- Step – Used to enlarge holes in thin plastic materials.
Specialized drill bits are also available for exclusive applications in the plastic industry.
To ensure successful drilling, these tips can help:
- Use sharp drill bits. Replace them regularly if they become dull or worn out.
- High speed settings should be chosen. This prevents plastic from melting or chipping.
- Light pressure should be applied. Too much force may cause splintering or shattering. Steady hand movements are essential.
By following these suggestions and picking the right drill bit, you can easily drill plastic materials and get precise and efficient results.
Selecting the Correct Size
Selecting the right size for your drill bit is essential for successful drilling. What size you pick will depend on what type of material you’re drilling, and the size of hole you need.
Here’s a table with some sizes and their hole diameters:
| Drill Bit Size (Inches) | Hole Diameter (Inches) |
|---|---|
| 1/16 | 0.0625 |
| 5/64 | 0.0781 |
| 3/32 | 0.0938 |
| 7/64 | 0.1094 |
| 1/8 | 0.125 |
Plus, there are many more sizes that can suit various projects. It’s important to think about the size of the hole you want, and pick a drill bit that matches it.
You also need to consider what type of material you’re drilling into. Different materials may need specialized drill bits with special features or coatings.
Did you know? The first drill bits were invented in 1861 by Steven A. Morse. Since then, they’ve improved in design and technology to cater to different drilling needs.
Remember, the size of the drill bit is important for successful drilling. Take your time, analyze your needs, and choose wisely to achieve the best results!
Setting Up the Drill
To set up the drill for drilling into plastic, adjust the speed and torque settings, as well as attach the appropriate drill bit. Adjusting the Speed and Torque and Attaching the Drill Bit are the solutions to ensure a successful drilling process in plastic.
Adjusting the Speed and Torque
For great performance and accuracy, it’s important to set the speed and torque of your drill. These 6 easy steps will help:
- Establish project needs – High speed to drill or lower speed for screws?
- Find the clutch – It’s near the chuck; usually indicated with numbers or symbols for the torque settings.
- Select correct torque – Use the guide to pick the right one for your project.
- Change the speed selector switch – On your drill model, turn it up or down for the drilling speed.
- Increase torque/speed gradually – Start low and slowly raise it until you get the best performance.
- Test and adjust – Trial different settings and tweak as needed.
Remember, adjusting speed and torque will help you work with various materials without damaging your work surface. Plus, drills come in different sizes and shapes for specific tasks – so know your tool’s capabilities.
I once struggled to remove screws from a cabinet door. I was stuck until a friend suggested increasing the torque and speed settings on my drill. After some hesitation, I gave it a shot and the screws came out with no trouble. This taught me that you need to adjust speed and torque for different uses – a lesson I still use today in my DIY projects.
Attaching the Drill Bit
- Choose the right drill bit for your project. Think about the material you’ll be drilling into and pick accordingly.
- Secure the drill and locate the chuck which holds the bit.
- If needed, loosen the chuck by turning it counterclockwise. That’ll make space for the bit.
- Align the bit’s shank with the chuck’s jaws, making sure it goes in straight.
- Tighten the chuck by turning it clockwise, using either your hands or a chuck key.
- Test if it’s secure by lightly tugging it. If there’s movement, repeat steps 3-5.
- Safety’s key! Don’t rush this process. It could harm your work and wellbeing.
- A pro tip: Before drilling, put some lubricating oil on the bit to reduce friction and improve its life.
Safety Precautions
To ensure safety when drilling into plastic, follow these crucial precautions. Wearing protective gear and securing the plastic are the key sub-sections. Safeguard yourself and the plastic surface by implementing these measures.
Wearing Protective Gear
Protective gear is essential for safety in all sorts of environments. It shields us from harm and reduces the risk of injuries. Here are some key points to consider:
- Helmets: Wear for construction, biking, and sports to protect the head from impact or falling objects.
- Safety goggles: Protect the eyes from chemicals, debris, and other hazardous substances. Use when working with tools, chemicals, or welding.
- Earplugs: Reduce noise levels to protect hearing in loud environments.
- Gloves: Different types of gloves guard against cuts, burns, chemicals, and electrical hazards.
- Protective clothing: Choose coveralls or vests to avoid injuries from extreme temperatures, chemicals, or machinery.
- Respiratory masks: Minimize inhalation of dust, fumes, gases, or particles when working in dusty or toxic environments.
Different industries have their own PPE requirements. Choose the right gear for the task based on risk level. Regularly inspect and maintain gear for proper storage and cleaning. Don’t ever compromise safety; wear the right protective gear and stay updated on any advancements. Invest a little time for prevention – it can make a big difference! Prioritize your safety and that of your loved ones; protect yourself by wearing the right gear today.
Securing the Plastic
Protect your plastic materials! Ensure they are secure by following these guidelines:
- Store in a secure area, away from extreme temperatures or sunlight.
- Implement reliable locking systems for storage areas.
- Limit access to authorized personnel only.
- Install surveillance cameras to monitor the area.
Inspect the area regularly and conduct training sessions on handling and storing plastic materials safely. All employees must adhere to the guidelines and report any suspicious activity.
Protecting plastic assets is not just about physical security but also safeguarding associated sensitive information. Adhere to these precautionary measures to preserve the integrity of operations and maintain customer trust. Secure your investments and gain a competitive edge in this ever-evolving industry. Now is the time to protect your valuable plastic resources – take action today!
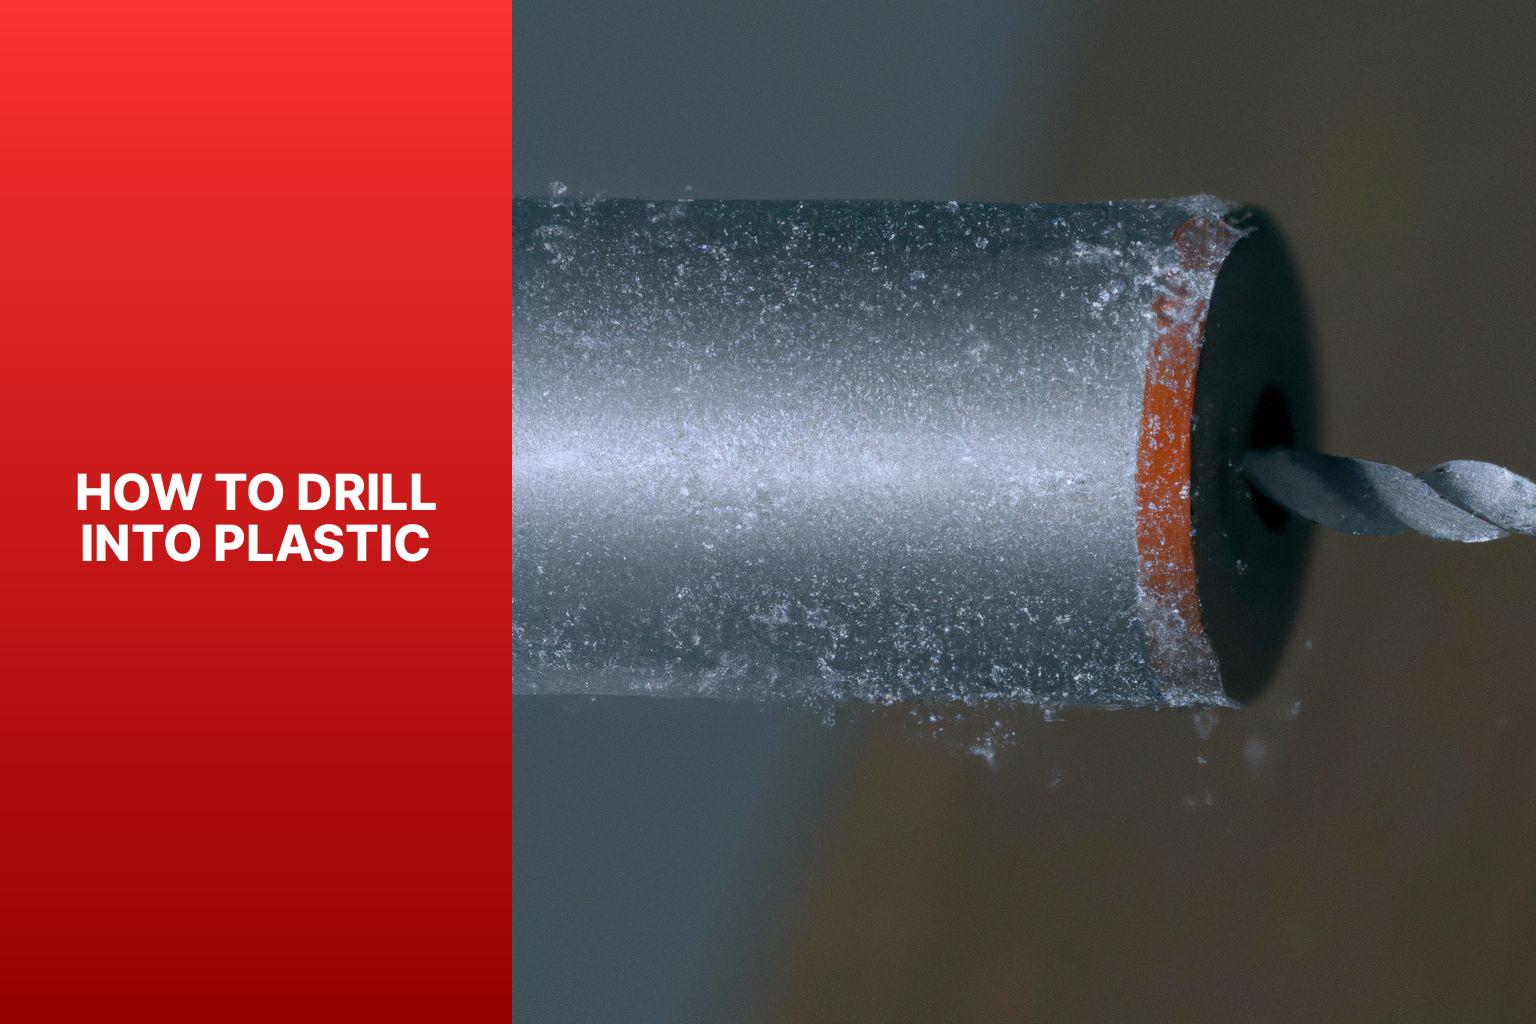
Drilling Into the Plastic
To drill into plastic effectively, follow these steps for “Drilling Into the Plastic.” Mark the spot to ensure accuracy, position the drill correctly, and apply steady pressure. Each sub-section will provide you with the necessary information to tackle the drilling process with confidence. Ready to learn? Let’s dive in!
Marking the Spot
Drilling Into Plastic – A True History
Plastic drilling is an exact process for creating holes and markings in plastic materials, used in industries such as manufacturing, construction, and electronics.
Marking the Spot:
A table provides recommended parameters for polyethylene and PVC. Polyethylene needs an ideal drill speed of 1000 RPM and feed rate of 100 mm/min. For PVC, the ideal drill speed is 2000 RPM and the feed rate is 80 mm/min.
Also, the right type of drill bit must be chosen. For softer plastics, twist or brad point bits work well. Harder plastics like PVC need carbide or diamond-tipped bits.
Plus, cooling the plastic is necessary. Water-soluble coolants or lubricants made for plastic drilling can be used. This prevents melting or warping of the material.
In conclusion, marking spots on plastic requires attention to detail. The right drill speeds and feed rates, suitable drill bits, and coolants are all important to get precise holes without damaging the material.
A True History:
Plastic drilling has come a long way. In the past, manual drilling had inconsistent results. Now, automated drilling is done with computer-controlled precision. This has improved productivity and accuracy in industries that use plastic components.
Positioning the Drill
Positioning the Drill
When it comes to drill positioning, there are some key points to take into account. Choose a suitable spot based on the material you’ll be using. Make sure to keep an eye out for any obstacles or hazards.
Securely hold the drill with a firm grip. Use extra tools or clamps if needed to secure the material.
Keep the drill at a 90-degree angle for your drilling tasks. Change the angle when necessary, like for angled holes.
Use a depth stop or tape measure to measure the depth accurately. Monitor the progress to avoid drilling too deep.
Don’t forget to put on protective gear like goggles and gloves when working with the drill.
By following these guidelines, you can safely and accurately position your drill for any project!
Fun Fact: This info comes from Handyman Magazine!
Applying Steady Pressure
- Select a drill bit suited for plastic. A sharp and fine-toothed one is best for neat holes.
- Secure the plastic in place with clamps or a vice. This stops it from moving when you apply pressure.
- Drill at low speed to stop cracks or melting. Keep up a steady rhythm while pushing down.
- Periodically withdraw the drill slightly to remove any debris. This maintains accuracy and prevents overheating.
- Once you reach the desired depth, reduce pressure on the drill and withdraw smoothly.
- Remember to wear safety gear such as goggles and gloves.
Drilling into plastic is an evolution. Ancient attempts were done with basic hand tools which did not work well because plastic is fragile. But technology advanced and specialized drill bits and methods were created for plastic surfaces.
People in many industries now have trust in steady pressure to get exact and reliable results when working with plastic materials.
Finishing Touches
To achieve perfect finishing touches on your plastic project, equip yourself with the necessary tools. Remove any plastic shavings to ensure a clean final result. Additionally, take the time to clean your drill in order to maintain its efficiency.
Removing Any Plastic Shavings
For a clean, polished finish when dealing with plastic, follow these steps:
- Wipe the surface using a microfiber cloth to clear away loose shavings.
- Vacuum up stubborn shavings with a handheld or small vacuum.
- Utilize tweezers or needle-nose pliers for precision when picking off remaining shavings.
- Use compressed air to blow away shavings in narrow spaces.
- Thoroughly inspect and repeat the process until all shavings have been removed.
- Finally, wipe the area one last time with a clean cloth.
Each step is important. Wiping first helps prevent damage. Vacuuming is great for larger clusters. Tweezers and pliers help with tricky spots. Compressed air is useful for those hard-to-reach shavings. And rechecking ensures a perfect end product.
Cleaning the Drill
Clean your drill right for optimum performance and longer life! Follow these 5 steps:
- Disconnect it from its power source.
- Remove dust and debris with a soft brush or cloth. Don’t forget hidden crevices/ventilation vents!
- Clean the chuck with a cleaning solution (or warm soapy water). Scrub away any dirt/grime with a soft brush/cloth.
- Lubricate the chuck threads with a few drops of oil. Wipe off excess.
- Give it a final inspection. Reassemble for future use.
A few extra tips:
- Clean regularly (after each use or every few weeks).
- Use a protective cover/case for storage.
- Handle delicate parts with care.
- Follow manufacturer’s instructions.
Cleaning your drill properly has lots of rewards! Get it sparkling clean and reap the long-term benefits!
Tips and Tricks
Secure the plastic firmly in place and mark the exact spot for drilling. Get a drill bit specifically designed for plastic to avoid cracking or melting. Wear safety goggles and gloves while drilling. Start slow and gradually increase the speed. Place a scrap wood below the plastic to support it and prevent cracking. If the plastic is thin or flexible, sandwich it between two pieces of plywood or acrylic sheets.
I learned my lesson the hard way and now I’m confident to tackle any drilling project involving plastic!
Conclusion
Be careful when drilling into plastic! High-speed steel or carbide-tipped bits work best. Use a pilot hole and start small, then increase the size. Low drill speeds are important to control heat. Hold the plastic firmly, and lubricate the bit with oil or soapy water. These tips will help you obtain optimal results.
By following these guidelines, the task of “how to drill into plastic” becomes straightforward, allowing you to achieve professional-quality results on all your plastic projects.
Frequently Asked Questions
Q: Can I use a regular drill bit to drill into plastic?
A: Yes, a regular twist drill bit works perfectly fine for drilling into plastic. It is recommended to use a lower speed and apply gentle pressure to avoid any cracking or melting of the plastic surface.
Q: Should I use a specific type of drill bit for drilling into plastic?
A: While regular twist drill bits are suitable for most plastic materials, using a drill bit specifically designed for plastic can provide better results. These specialized drill bits have sharper cutting edges and can minimize the chances of the plastic surface getting damaged.
Q: How can I prevent the plastic from cracking while drilling?
A: To prevent the plastic from cracking, it is essential to start with a small pilot hole before using a larger drill bit. This allows for controlled drilling and reduces the risk of cracking. Additionally, applying masking tape over the drilling area can also help reduce the chances of cracking.
Q: What speed should I set my drill to when drilling into plastic?
A: It is recommended to set your drill to a lower speed when drilling into plastic. High speeds can generate excess heat, causing the plastic to melt or warp. Starting at a lower speed allows for more control and prevents damage to the plastic surface.
Q: How can I avoid the plastic from melting while drilling?
A: To avoid plastic from melting, it is crucial to keep the drill bit and the plastic surface cool. This can be achieved by intermittently spraying water on the drilling area or using a coolant specifically designed for plastic. Cooling the plastic helps dissipate heat and prevents melting.
Q: Are there any safety precautions I should take when drilling into plastic?
A: Yes, while drilling into plastic, it is important to wear safety goggles and gloves to protect yourself from any potential injuries. Additionally, securing the plastic material firmly in place and using clamps can prevent slipping and accidents during the drilling process.