How to Remove Bit from Hammer Drill. Bits are reusable accessories. Obviously, you cannot use an electric drill wholly without a drill bit, and it’s crystal clear – instead, you need a drill bit to execute drilling and percussion tasks incredibly.
Drill bits are available in various types and shapes, and choosing the appropriate one maximizes the chances of getting the best result. Meanwhile, this is found in hammer drills just as it’s in regular drills.
The variance in the availability of bits in their types makes drills work reliably when battling different tasks. You can remove and replace bits for as long as you desire. Thus, bits are removable, and that’s a fantastic thing about them. Hammer drills have their chucks in metal and plastic form; it all depends on what you buy actually that would dictate the removal procedures of the bits from the hammer drill.
How to Remove Bit from Hammer Drill. Indeed, it would help if you use this piece with detailed pieces of information to know how you’re to remove bits of all types from hammer drills.
Understanding Chuck Types: Keyed, Keyless, and SDS
Before you can remove a bit, it’s essential to identify what type of chuck your hammer drill has, as the removal process is completely different for each. There are three main types you’ll encounter. How to Remove Bit from Hammer Drill.
- Keyed Chuck: This is a traditional chuck that requires a special “key” (a small geared tool) to tighten and loosen the three jaws that grip the drill bit. You’ll see a series of small holes around the collar of the chuck where the key fits in. This type offers a very secure grip but requires you to keep track of the key.
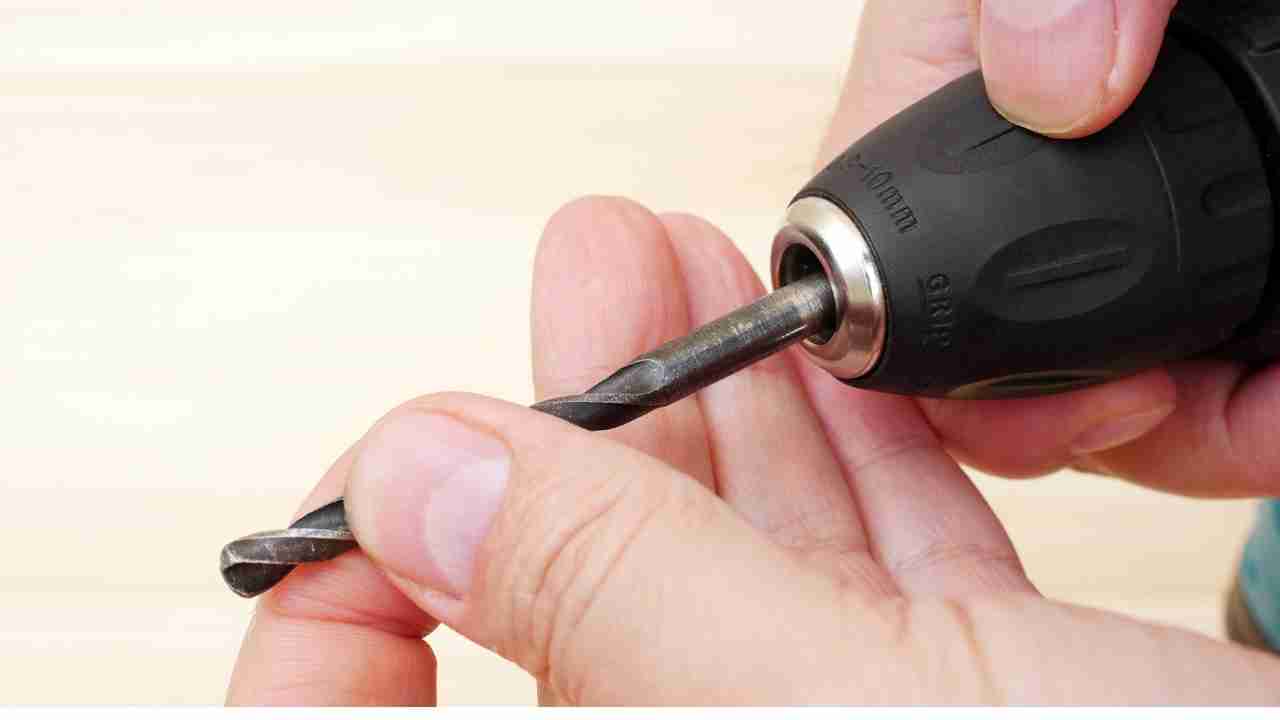
- Keyless Chuck: This is the most common type on modern standard drills and many lighter-duty hammer drills. It also uses three jaws to grip the bit, but you tighten and loosen them by simply twisting the outer sleeve or collar of the chuck by hand. It’s fast and convenient, but sometimes doesn’t grip as tightly as a keyed chuck.
- SDS Chuck: This is a specialized system found on more powerful rotary hammers. SDS stands for “Slotted Drive System.” It doesn’t use jaws at all. Instead, it has a quick-release collar and internal ball bearings that lock into slots on the shank of a special SDS bit. This allows the bit to move back and forth during the powerful hammering action. The removal process involves pulling back this spring-loaded collar, not twisting anything. Identifying your chuck type is the first step to a quick and easy bit change.
Table of Contents
How to Remove Bit from Hammer Drill? 7 Easy Steps
How to Remove Bit from Hammer Drill 1 -7 Easy Step
- Switch off the power of the hammer drill by using the power button if you use a cordless hammer drill. Remove the cord from the power outlet if you use the cordless.
- Grip the tip of the hammer drill to release the chuck jaws so that the bit can be loosened out of the tool easily. Turn the sleeve tip of the chuck anti-clockwise to relax the chuck’s jaw from the bit.
- Use your hand to clamp the sleeve of the bit while you wiggle it forth and back to unhook the shank of the hammer drill bit from the power tool.
- Remove the bit gently from the trough of the 3-jawed chuck to avoid unnecessary breakage of the bit.
- Peradventure the hammer drill bit is stuck in the hook; use a screwdriver or the wrench to turn the chuck encasement anti-clockwise.
- If that’s proving difficult to achieve, grip the chuck firmly with your hand or wrench while you start revving the bits on the hammer drill. Also, you can press the direction set button to enable the revving of the bit to be clockwise or anti-clockwise.
- All of these would enable the easy removal of the bits even when jammed in the chuck. Practice these gently and ensure you maintain the best result doing this.
What are the 5 Types of Drill Bits?
1. Black Oxide Pre-heated Drill Bits:
This is identifiable from its identity. The tip and the sleeve of the bit are coated with black greasy oil. In fact, drill bits with this description can easily dent hard surfaces such as rocks, metals, and concretes.
2. Titanium Nitride-coated Drill Bits:
drill bits with this feature have a golden color. Drill bits possessing this feature are accepted and acknowledgeable to be more durable than conventional drill bits.
3. High-Speed Drill Bits:
They are high-carbon steel bits usable in woods and light and hard thickness materials. These bits are made of steel and could be durable as long as they are used rightly.
4. Brownish hammer drill bits:
hammer drill bits under this caliber remove internal stresses from materials. They help reduce the chances of distortion in metals that could affect the dimension later on. They are usable on ferrous and non-ferrous metals.
5. Low-Carbon Drill Bits:
this is an alternative to High-Carbon Steel bits. They are cheap and easy to find. They require constant sharpening to remain effective. The percentage of carbon in their constituent is between 0.005% and 0.3%.
Are there Special Bits for Hammer Drill?
Yea, there are. The specialized drill bits for hammer drills are purposefully made for masonry reasons. Naturally, they require a high propensity to be at their best, but you can also use a hammer drill for standard drill bits. Examples of specialized hammer drill bits are masonry bits, screwdriver bits, peak drill bits, twist drill bits, step drill bits, and many more.
Can I Use a Rotary Bit in a Hammer Drill?
Yes, you can use rotatory bits for hammer drills. Rotatory bits work best on wooden surfaces, and their slow revolution rate per minute makes them stand out. However, the high revving power of hammer drills makes them recommendable for the power tool to scoop speedy rpm. Hammer drills can put out 30,000rpm, making rotatory bits use hammer drills to increase results for hardened tasks. “Now How to Remove Bit from Hammer Drill.”
Can You Use Regular Masonry Bits with a Hammer Drill?
Masonry bits are among the specialized bits that hammer drills use. The ability of a hammer drill to rev the bits at a high rate with such a high propensity makes them usable for breaking through concretes, bricks, rocks, and so on.
On the contrary, using hammer drill bits such as a masonry bit on regular drills will dwindle the outcome and effectiveness, unlike formally using it on hammer drills.
Why is My Drill Bit not Coming Out?
It could be jammed on the inside of the chuck. If you turn the chuck’s teeth of the drill anti-clockwise to get the 3-jaw opened, but the hammer drill bit isn’t releasing, it’s jammed. It could be that it was wrongly fixed from the onset.“Now How to Remove Bit from Hammer Drill.”
Besides, a wrongfully set drill bit won’t swivel, so this should be corrected from the start. However, if it revs but the bit isn’t coming out as it should, then there’s a certainty the bit is stuck on the inside of the hammer drill.

Final Words
How to Remove Bit from Hammer Drill? Yea, that’s all about the procedures of removing bits from hammer drills. These steps are practical ones that anyone can execute with absolute ease. They are guidelines for using a hammer drill for a long time. Nonetheless, you’d need to often clean the bits before and after use. “Now you know exactly how to remove a bit from a hammer drill, whether it has a keyed, keyless, or SDS chuck.”
Frequently Asked Questions & Answer
Question 1: My keyless chuck is stuck and won’t loosen. What should I do?
Answer 1: If a keyless chuck is stuck, it’s often due to being overtightened or having debris inside. First, try using two pipe wrenches or channel-lock pliers (one on the front collar, one on the back sleeve) with a cloth to protect the metal, and twist them in opposite directions. If that doesn’t work, a light tap with a hammer on one of the wrenches can sometimes break it free. Always unplug the drill or remove the battery before attempting this.
Question 2: Do I need to unplug the drill before changing the bit?
Answer 2: Yes, absolutely. For corded drills, always unplug them from the power source. For cordless drills, remove the battery pack. This is a critical safety step that prevents the drill from accidentally starting while your hands are on the chuck, which could cause serious injury.
Question 3: Why is my drill bit wobbly even after tightening it?
Answer 3: A wobbly bit can be caused by a few things. First, check if the bit itself is bent by rolling it on a flat surface. Second, ensure the bit is inserted straight and centered in the chuck before tightening. If the problem persists, the chuck’s internal jaws might be worn out or damaged, and the chuck itself may need to be replaced.
Question 4: Is it normal for an SDS bit to be slightly loose in the chuck?
Answer 4: Yes, it is completely normal for an SDS bit to have a small amount of back-and-forth “play” or looseness even when it’s locked in. This design is intentional and allows the bit to move independently during the hammering action, transferring the impact energy directly to the tip of the bit more efficiently.