Finding the right drill bit for a 3/8 anchor is the most critical step for a secure installation in concrete. This guide will explain why the correct size is 1/2 inch and how to do the job perfectly. A hole that’s too small will prevent the anchor from fitting, while a hole that’s too large will result in a weak, spinning anchor that cannot bear any load. This leads to a critical question for any serious project: drill bit for 3/8 anchor
This comprehensive guide provides the exact size you need and delves deeper into the technical reasons behind it. We will also walk you through the professional, step-by-step process to ensure every anchor you install is safe, secure, and reliable.
Table of Contents
How to Install a 3/8″drop in Anchor. Slotting in a 3/8 drop-in anchor into concretes while executing an overhead installation requires discreetly using the right hammer drill bits. This would make the drop-in anchor fit into the concrete walls.drill bit for 3/8 anchor
Hammer drill gives pulsating knocks on concretes, but less would be its impact if the right drill bit isn’t predetermined ahead of anything. Meanwhile, since there are different sizes of hammer drill bit, subscribing to the dilemma of what to buy is a natural feeling. drill bit for 3/8 anchor
The Direct Answer: The Industry Standard Drill Bit Size
Let’s get straight to the point. For a standard 3/8″ drop-in anchor, the industry-standard and manufacturer-recommended drill bit size is 1/2″ (one-half inch).drill bit for 3/8 anchor
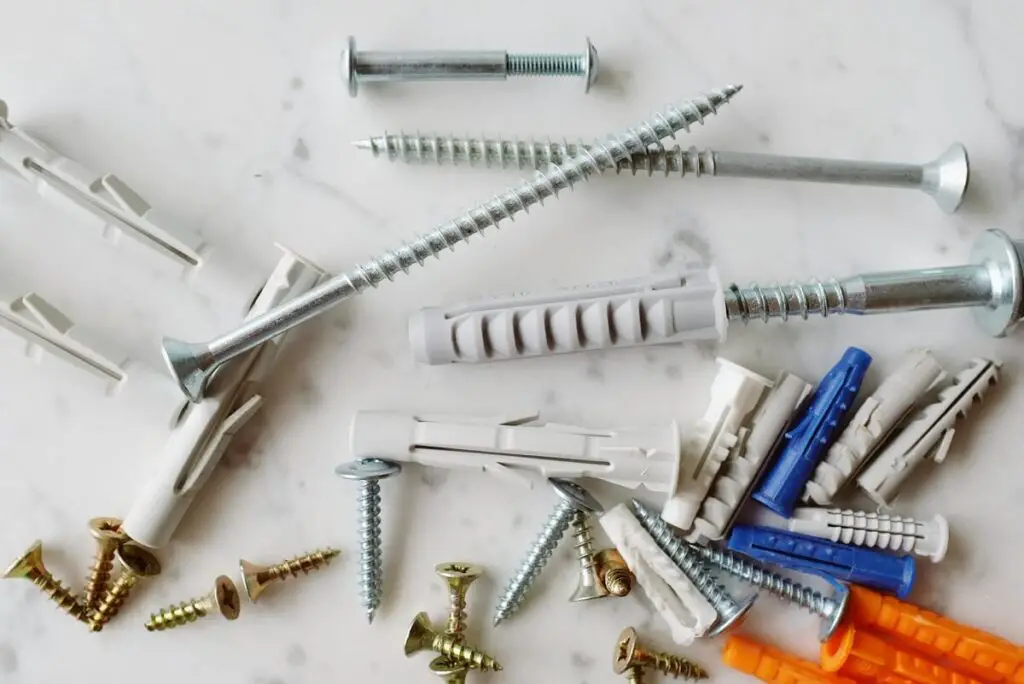
It is crucial that you use a carbide-tipped masonry drill bit designed specifically for use with a hammer drill. A standard wood or metal drill bit will be destroyed by concrete and will fail to create a proper hole. Step-by-Step Guide: How to Install a 3/8″ Anchor
Technical Explanation: Why Is the Drill Bit Bigger Than the Anchor?
This is a common point of confusion. Why use a 1/2″ drill bit for a 3/8″drop in anchor. The key is understanding the anchor’s anatomy. The “3/8 inch” measurement refers to the internal thread diameter of the anchor—the size of the bolt or threaded rod that you will screw into it.
However, the anchor itself has an outer body or sleeve that is much wider than its internal threads. This outer body is what makes contact with the concrete. The 1/2″ drill bit creates a hole that is perfectly sized for this outer body to slide in snugly. drill bit for 3/8 anchor. When the setting tool is hammered into the anchor, it forces an internal wedge to expand the sleeve, pressing it firmly against the walls of the 1/2″ hole and creating immense friction. This friction is what gives the drop-in anchor its incredible holding power. drill bit for 3/8 anchor
The Science Behind the Tools: Why Carbide and Hammer Action are Essential
Understanding the correct drill bit size is only half the battle; knowing why specific tools are required is what separates an amateur from a professional. The recommendation for a carbide-tipped masonry bit is not arbitrary. Concrete is a highly abrasive composite material made of cement, sand, and hard aggregates like gravel. A standard High-Speed Steel (HSS) drill bit, designed for wood or metal, would become dull and useless within seconds against such a surface. Carbide, a much harder and more heat-resistant material, is brazed onto the tip of the steel bit. This allows it to pulverize the concrete and aggregates without losing its cutting edge. Furthermore, the hammer action of your drill is indispensable. This function doesn’t just rotate the bit; it simultaneously drives it forward with thousands of tiny, rapid impacts per minute. drill bit for 3/8 anchor. This percussive force is what effectively chips away at the masonry, allowing the bit’s flutes to clear the resulting dust from the hole. Attempting to drill into concrete without this hammer function is a slow, laborious process that generates excessive heat, risks burning out your drill’s motor, and often results in an improperly formed, glazed-over hole that is unsuitable for any anchor. Therefore, the combination of a sharp carbide tip and powerful hammer action is the only professional method for preparing a hole for a drop-in anchor.
Step-by-Step Guide: How to Install a 3/8″ drop in Anchor
Achieving a secure fit requires more than just the right drill bit. Follow these professional steps for a flawless installation every time.

Step 1: Mark Your Location and Set the Drill Depth
First, use a pencil or a permanent marker to clearly mark the exact spot for your anchor. Accuracy is key. how to install a 3/8 drop in anchor
Next, you must control the depth of the hole. How to Install a 3/8″ Anchor? A standard 3/8″ drop-in anchor is typically 1-9/16 inches long. To ensure the anchor sits flush or slightly below the concrete surface, you must drill the hole slightly deeper. A good rule of thumb is to add at least 1/8″.drill bit for 3/8 anchor. Therefore, set your hammer drill’s depth stop or measure and mark your drill bit with tape at 1-3/4 inches. drill bit for 3/8 anchor
Step 2: Drill the Hole Correctly
Ensure your hammer drill is set to “hammer” mode. Hold the drill perfectly perpendicular (at a 90-degree angle) to the concrete surface. Applying steady, firm pressure, drill the hole until you reach the depth stop or your tape marking. Do not force the drill; let the hammer action do the work.
Step 3: Clean the Hole Thoroughly (The Most Critical Step)
Many DIY installations fail because of this skipped step. A hole filled with concrete dust will prevent the anchor from making proper contact with the solid concrete, drastically reducing its holding strength. drill bit for 3/8 anchor.
To clean the hole properly, use a combination of a wire brush and compressed air. First, insert the wire brush and scrub the inside of the hole to loosen all debris. Then, use a can of compressed air or an air compressor to blow all the dust out. Repeat this process at least twice to ensure the hole is perfectly clean. drill bit for 3/8 anchor
Step 4: Install and Set the Anchor
How to Install a 3/8″drop in Anchor. Gently tap the drop-in anchor into the clean hole until its top is flush with the concrete surface. Now, insert the correct 3/8″ setting tool into the anchor. Hammer the setting tool with firm, confident strikes until the shoulder of the tool makes contact with the top of the anchor. drill bit for 3/8 anchor. This indicates the anchor is fully expanded and properly set
Common Mistakes to Avoid
Even with the right tools, simple mistakes can lead to a failed installation. Here are two common errors to watch out for:
- Under-drilling the Hole: If the hole is too shallow, the anchor will not sit flush with the concrete surface. This not only looks unprofessional but can also create a tripping hazard and prevent proper setting. Always use a depth stop or measure your bit carefully. drill bit for 3/8 anchor
- Over-torqueing the Bolt: A drop-in anchor is set by expanding the sleeve, not by tightening the bolt. Once the anchor is set, thread the bolt in by hand until it is snug. Over-tightening the bolt with a wrench can strip the internal threads, rendering the anchor useless .drill bit for 3/8 anchor .
Choosing a Quality Hammer Drill and Bit
The quality of your tools directly impacts the quality of your work. When drilling into concrete, a standard drill is insufficient; you need a proper hammer drill that provides both rotation and rapid hammering action. For the bit, always choose a reputable brand known for its durable carbide tips. A cheap, low-quality bit can wear out quickly, resulting in an undersized hole and a frustrating experience. Investing in good tools will save you time, effort, and ensure a safer, more reliable installation. drill bit for 3/8 anchor.
Conclusion: The Foundation of a Strong Connection
“In conclusion, selecting the correct drill bit for a 3/8 anchor is straightforward: you need a 1/2″ carbide-tipped masonry bit.” you need a 1/2″ carbide-tipped masonry bit. However, a successful installation depends equally on following the correct procedure—drilling to the proper depth, meticulously cleaning the hole, and using the correct setting tool. By mastering these details, you ensure that every anchor provides the maximum holding power required for a safe and durable project.
Question 1: Can I use a regular drill for a drop-in anchor?
Answer 1: No, you should always use a hammer drill when drilling into concrete or masonry for a drop-in anchor. A regular drill does not have the necessary impact force to create a clean and properly sized hole, and you risk burning out the drill’s motor.
Question 2: What happens if the hole is too big for the 3/8″ anchor?
Answer 2: If the hole is too big (e.g., larger than 1/2″), the drop-in anchor will spin in the hole and will not be able to expand and grip the concrete. It will be completely unsafe and unable to bear any load. You will need to drill a new hole in a different location.
Question 3: How do I know when the drop-in anchor is properly set?
Answer 3: You will know the anchor is properly set when the shoulder of the setting tool makes firm, metal-to-metal contact with the top of the anchor. You will feel and hear a distinct solid impact, indicating the internal wedge has fully expanded the anchor sleeve.
Question 4: Is it necessary to use a setting tool for a 3/8″ drop-in anchor?
Answer 4: Yes, it is absolutely necessary. The setting tool is specifically designed to drive the internal plug down and expand the anchor’s sleeve correctly. Attempting to set the anchor with a simple punch or a bolt can damage the threads or fail to expand the anchor fully, resulting in a significantly weaker and unsafe connection.
Question 5: Can I use a 3/8″ drop-in anchor in brick or hollow block?
Answer 5: Drop-in anchors are specifically designed for use in solid, dense materials like concrete. They are generally not recommended for use in softer base materials like brick or hollow block (CMU), as these materials may not be strong enough to handle the expansion forces and could crack or crumble, leading to a failed anchor.